Hi all, my name is Karel and I’m Santa’s Little Helper this year!
I have accepted the Festive Tech Calendar Hackathon challenge from Wesley Haakman.

What does it take to participate?
Not much!
- Solution must be hosted in a GitHub repository
- Create a repository that contains a README.MD file with a write up of the solution
- Solution has to be recreated by the reviewers
The Use Case
Santa is going digital! Santa is looking to automate some things and instead of going through all the paperwork he decided that families can now send in their wish list digitally. Santa and his elves created a website for families to create their wishlist and send it to Santa. No more post stamps, no more lists being lost through mail and no more papercuts!!
The Requirements
Santa has provided an application and he is not looking to change the code of the application, therefor code changes are prohibited in this hackathon.
- Website hosting and scaling
- The solution needs to be deployed on Microsoft Azure. The Website needs to scale keep up with the growing number of children wanting to send in their wish list.
Challenge accepted Mister Haakman!
My Solution
My solution to this hackathon, will be divided in parts and multiple steps. I will give an introduction to Azure DevOps, Microsoft’s tooling which allows Santa to create CI/CD pipeline deployments of application workloads to Azure.
So Santa Wesley has made an application and I am going to create an Azure environment and give the possibility to Santa for deploying the Santa Wishes application to Azure. Starting from creating an Azure DevOps organization and project, next importing the source code of the GitHub repo into Azure DevOps Repos and use Git commands to push code to Azure DevOps Repos.
Next, we will be creating a build pipeline using the Azure DevOps pipeline.yml approach.
I will help Santa Wesley to create the Azure environment and deploy the application using Azure DevOps pipelines.
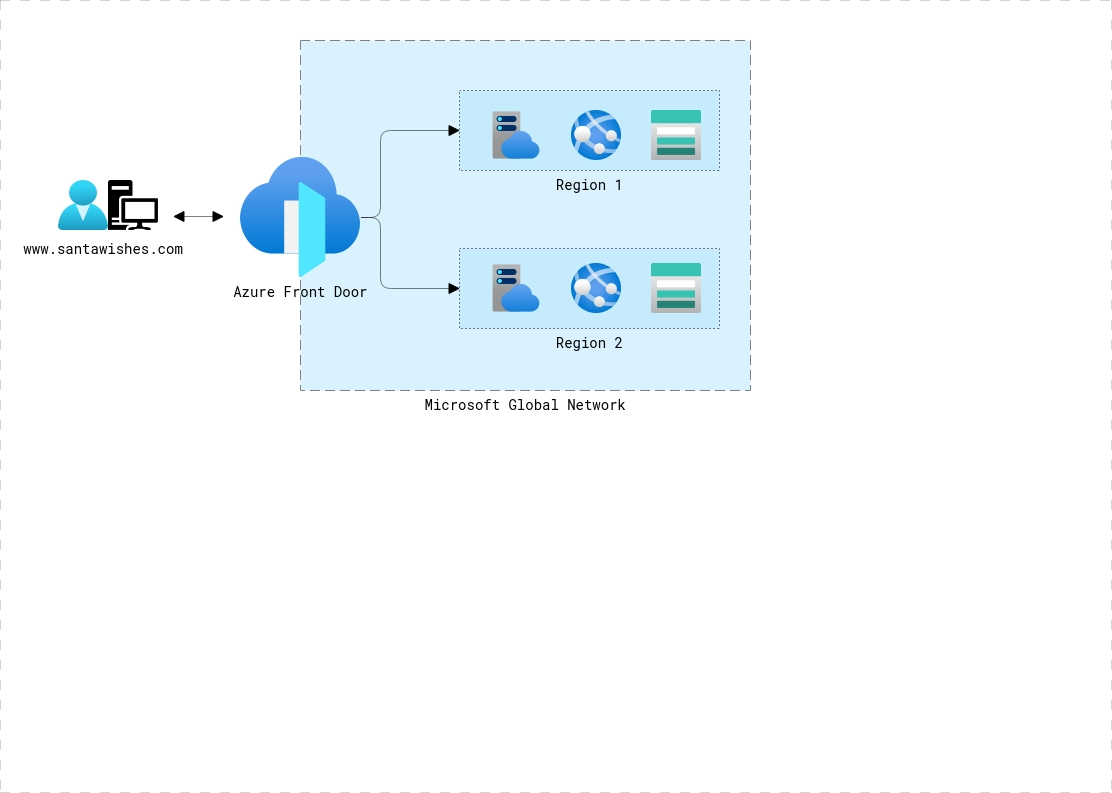
The Azure environment will look like this:
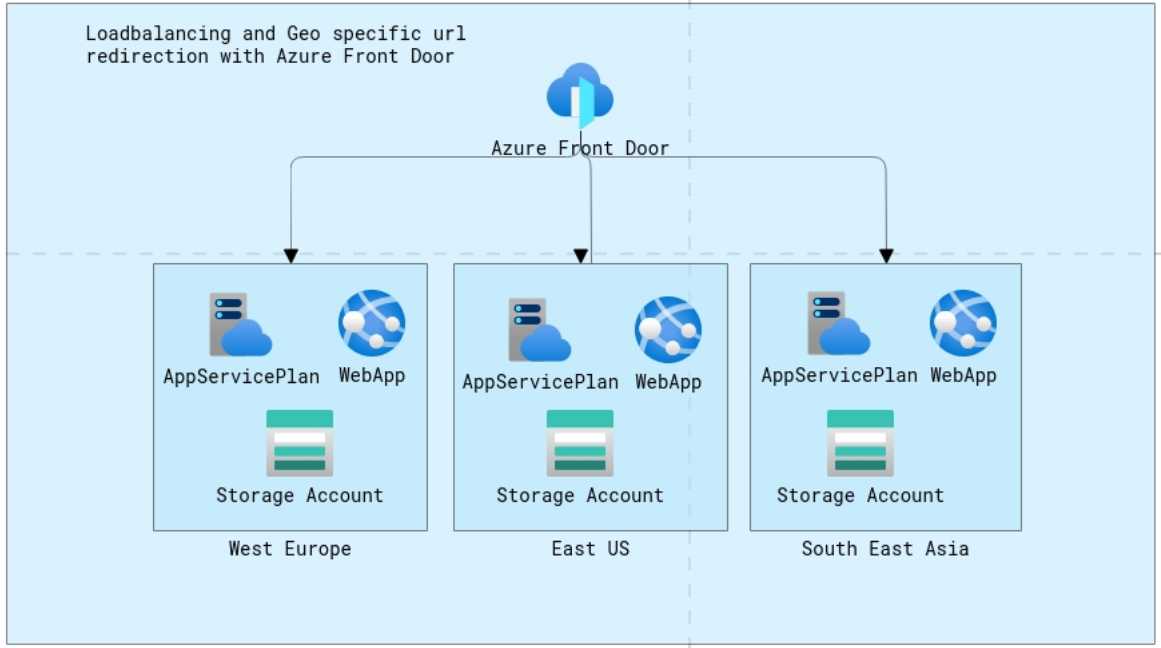
I have created ARM Templates that deploy an App Service Plan with an Web App, and a storage container. The storage container will be giving some output to the Web App, and provides a container namen and an ConnectionString. Because I am using ARM Templates, based on a Master Template and Linked Templates, we can re-use the templates and just change 1 parameter (like the region) to re-deploy the complete solution in another Azure Region.
To provide a Geo redundant solution, and to have the best latency for users that are in a different region, I will use Azure Front Door. Which is a global, scalable entry-point that uses the Microsoft global edge network to create fast, secure, and widely scalable web applications. With Front Door, we can access the contents from a global audience through Azure!

Different pipelines are available. I have split up the infrastructure deployment and the deployment of the sourcecode to the web apps into different pipelines.

ARM Templates
The solution we are deploying contains linked templates, the linked templates must be accessible by the Azure Resource Manager via an public URI. This works great when your templates are stored in a storage account and are accessible via a SAS token.
To authenticate to Azure Storage Accounts, you can append a time-based, delegated shared access signature (SaS) at the end of storage account URI. Since the SaS token is part of the URI, Azure Resource Manager is able to retrieve the files from Azure Storage Accounts using the SaS token.
In Azure Pipelines, Microsoft has provided a task called Azure File Copy. You can use this task to easily copy files or folders to Azure blob storage. This task generates SaS token, copy files to blob storage and then outputs the container URI and SaS token as task variables. To use this task, all you need is the Storage Account name and a Service Connection to your Azure subscription where the Storage Account resides.
How does it work?
How does the solution work?
When we check our code into the DevOps repo, a pipeline will be started and the Azure Resource Manager downloads the template and creates a new deployment in the target resource group/subscription with the downloaded template and an optional parameter files. You can see the deployment log in the deployments section of your resource group or subscription if you want to follow up).
We can run the pipeline manually if we want.
Prereqs to deploy the solution
- Active Azure Subscription
- Visual Studio Code installed
- Git installed
- Have fun!
Step by step guide to deploy the solution
Step 1: Create an Azure DevOps organization
If you are new to Azure DevOps, you can follow this guide to create an organization!.
TIP: You must provide a unique name for your Azure DevOps organization. If the process is complete, you are redirected to the Azure DevOps portal (dev.azure.com/!organizationname!) Once you have been redirected, you are asked to create a new project.
Step 2: Create a project
Once you have created your Azure DevOps organization, you have to create a seperate project. Again, please follow this link to get a guided step for creating a project!.
TIP: make your project private.
Step 3: Create Azure DevOps Repos
We are going to use Azure DevOps Repos to store our code, it offers a Git-compatible source control service!
My solution is based on 3 different repos.
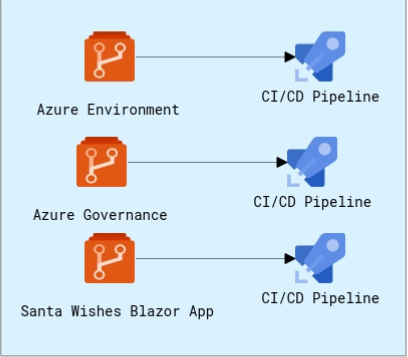
I have a first repo with ARM Templates that will deploy the Azure Infrastructure (AZ_Infra). I have a second repo with ARM Templates that set Governance policies (AZ_Config). And I have a third repo with the application code in it (SantaWishesApp).
First thing we need to do is install Visual Studio Code, then we are able to clone a public GitHub repo into Azure DevOps Repos via Visual Studio Code.
After installing Visual Studio Code, go to the Azure DevOps portal and select Repos.
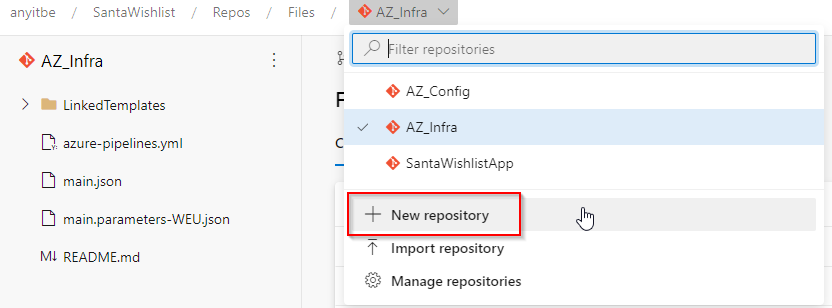
We have to create 3 repos:
- AZ_Infra
- AZ_Config
- SantaWishesApp
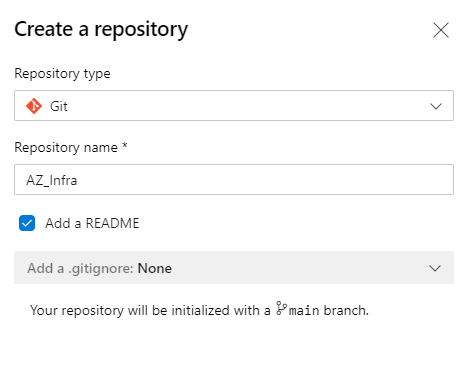
This gives you several options to choose from, specifying how this repo will be used. Select Clone in VS Code.
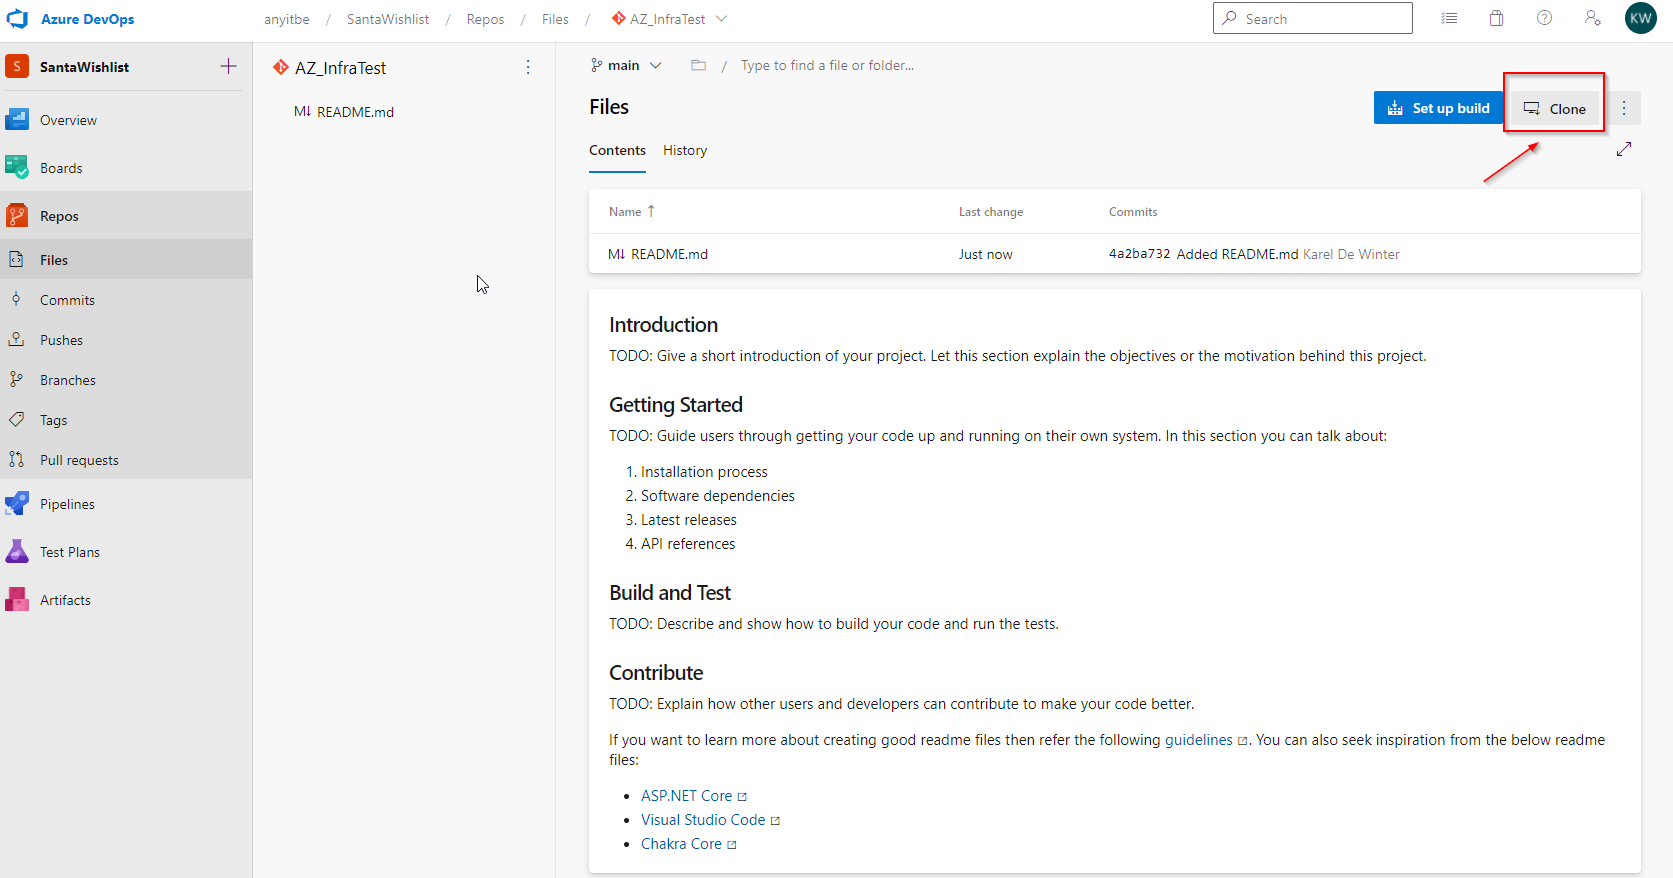
First we need to specify where Visual Studio Code needs to clone the Azure DevOps Repos folder in. Select a local drive, and create a new empty folder. If asked, provide your Azure DevOps credentials.
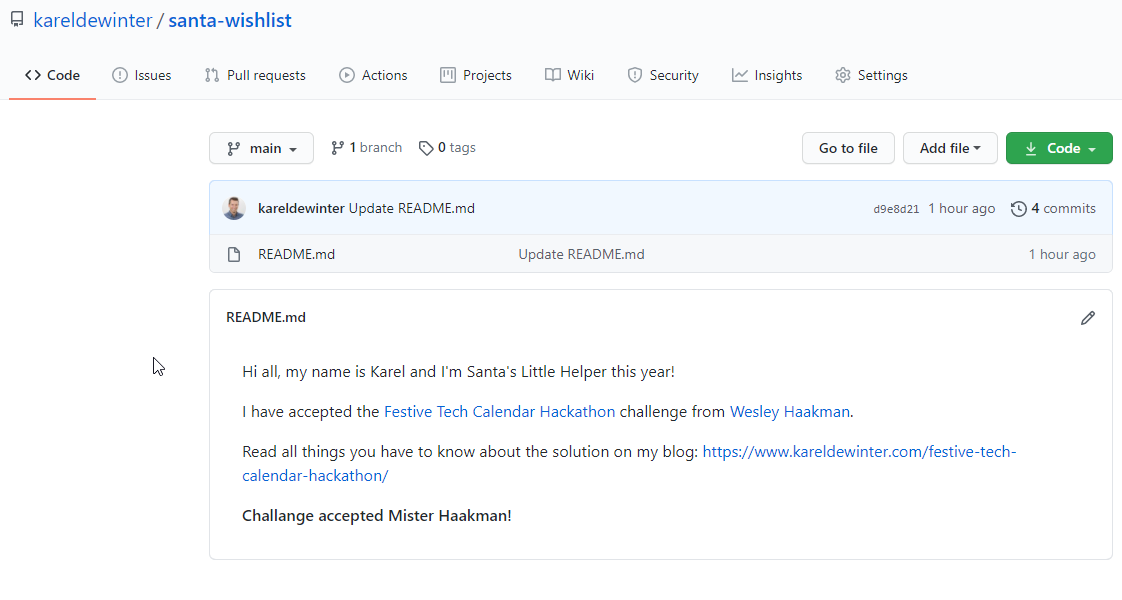
Now we can add our source code by placing the files from my github repo into the folder. HINT: you can download all the code as zip file from the github repo.
Since the folder is automatically Git-enabled, we can make use of the source control extension as part of VS Code.
Click the sync changes icon, and wait for all files to get pushed into Azure DevOps Repos. If this is completed, check back in Azure DevOps repos and see all the files in place.
![]()
HINT: You need to do this for all 3 different repo’s. You have to copy and paste the files from my GitHub page to the repo’s you just created on your local system: AZ_Infra, AZ_Config, SantaWishesApp.
Step 4: Create a Service Connection
Before we can use the Pipelines in Azure DevOps, we have to give Azure DevOps the credentials to create and change resources in our Azure Environment.
The solution to that is a Service Connection. Please read the steps how to create a Service Connection
Go to project settings and add a Service Connection.
It is important that you use the same names as specified here, because we use that in the build pipelines!
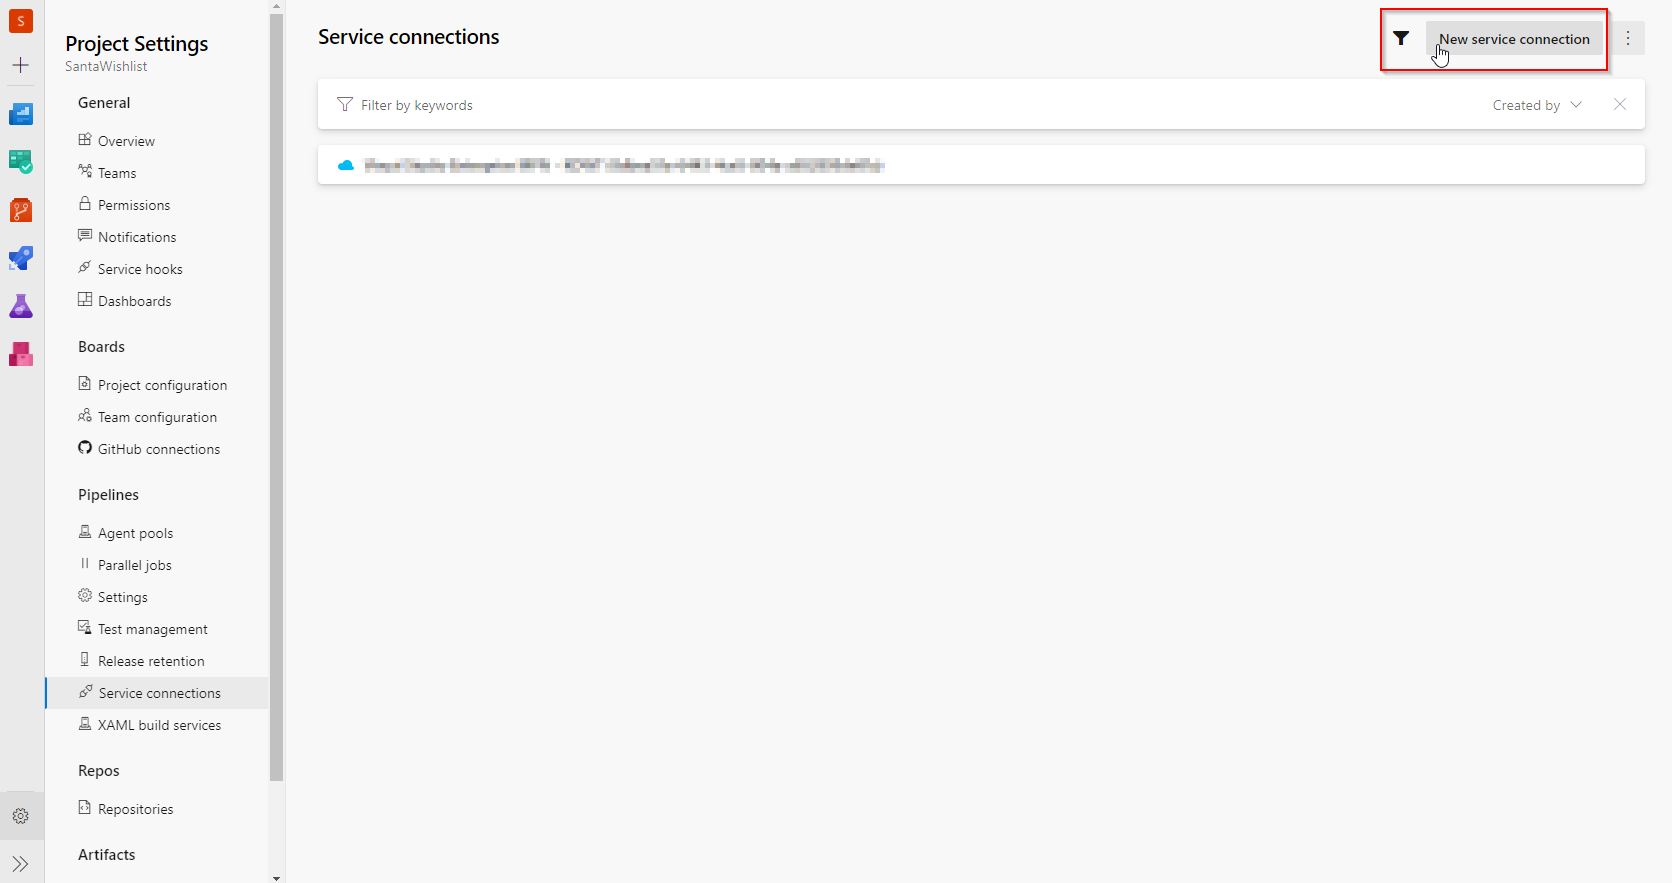
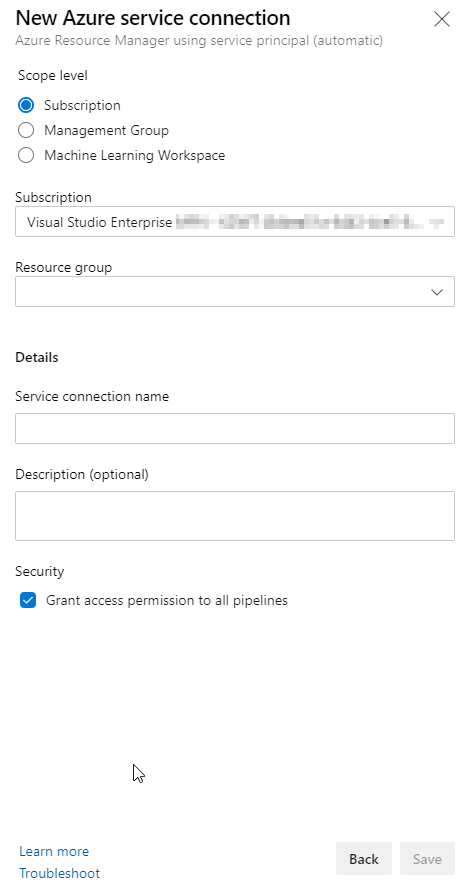
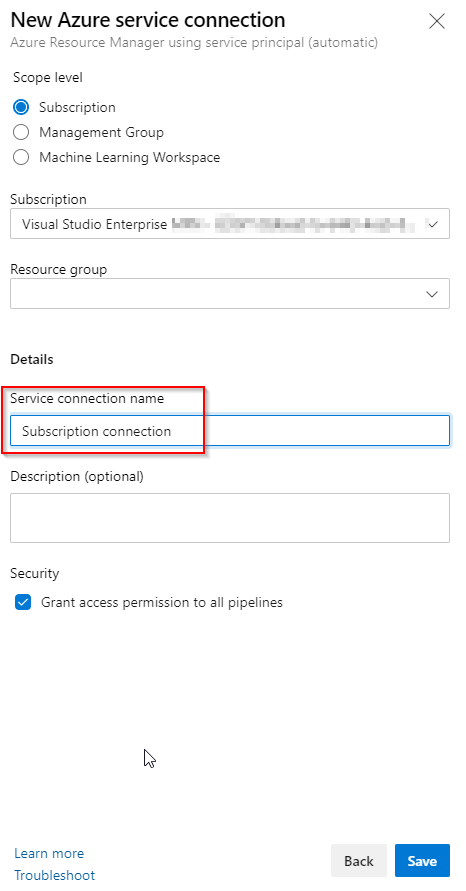
Select your subscription, leave the resource group blank and fill in this name: Subscription connection.
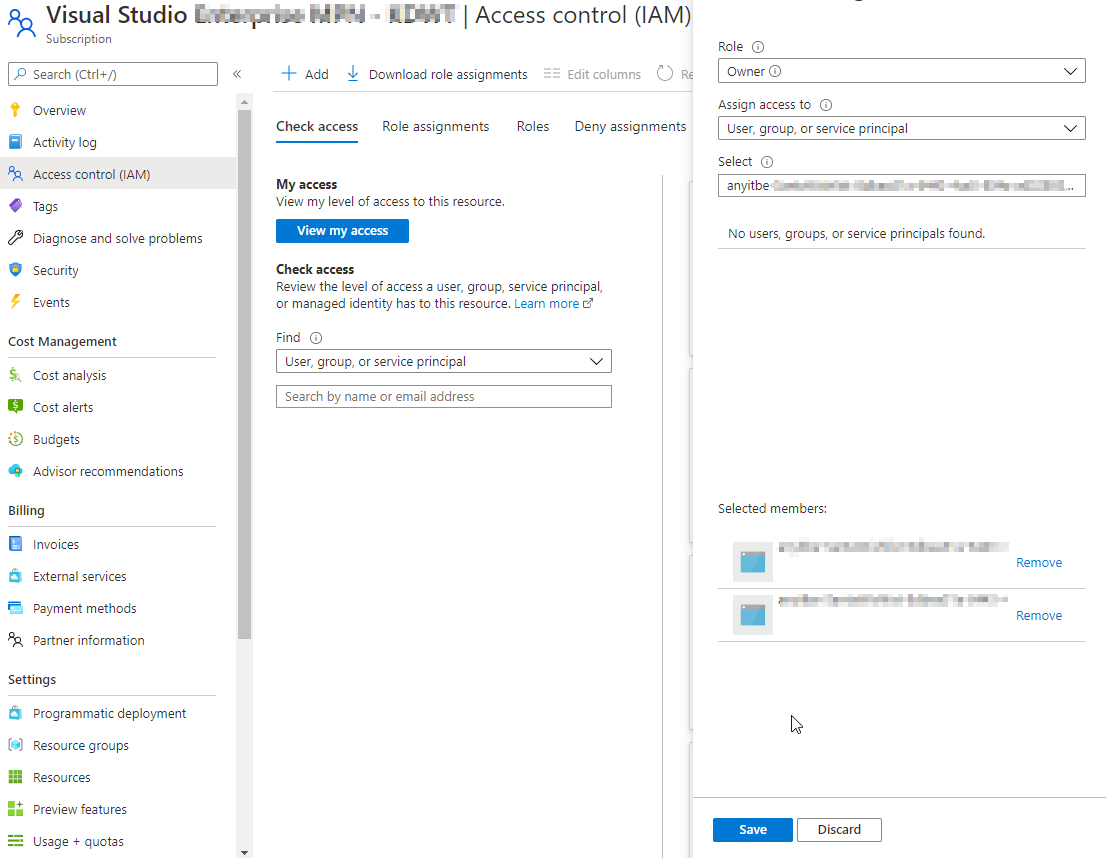
Now that we have created the Service Connection, we have to provide owner rights to this object, because we will be creating Managed Identities and policies on subscription level.
Go to Azure Active Directory and find the name of the created Service Connection. Go to the Azure Portal and find the Azure Active Directory Blade. Then look at the App registrations and select All applications:
If you filter on Created on, you will find the newly created identity.
Now go to the subscription and add a role assignment for the just created service connection. We need owner rights:
Step 5: Create a Storage Account and SAS token
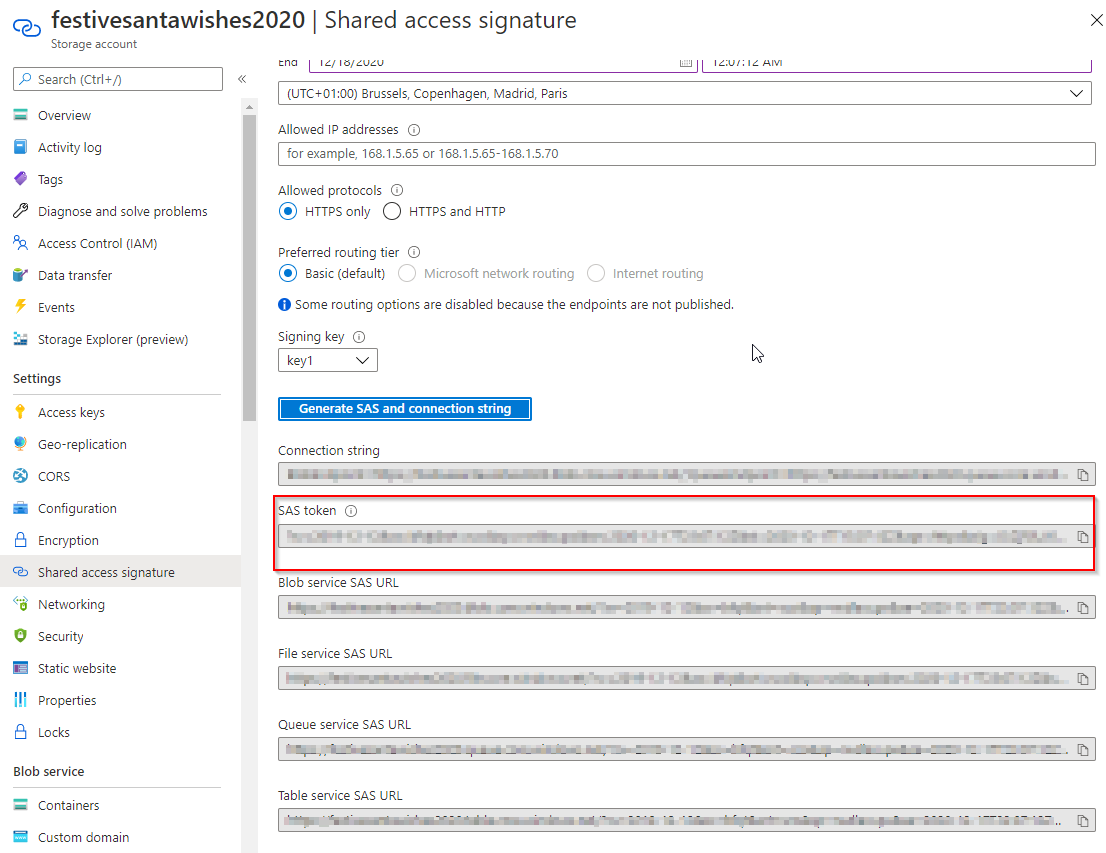
To authenticate to Azure Storage Accounts, you can append a time-based, delegated shared access signature (SaS) at the end of storage account URI. Since the SaS token is part of the URI, Azure Resource Manager is able to retrieve the files from Azure Storage Accounts using the SaS token.
If you don’t have a clue how to create a SAS token, go to the docs page!
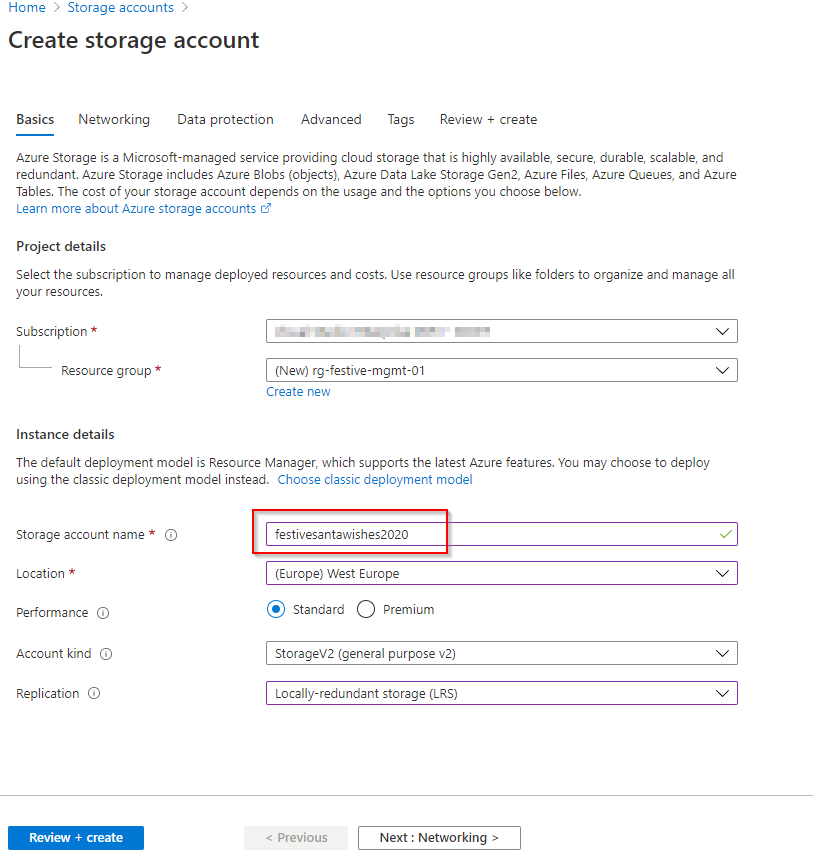
First we have to create a storage account, if you don’t have a resource group, then just create a new resource group one from here.
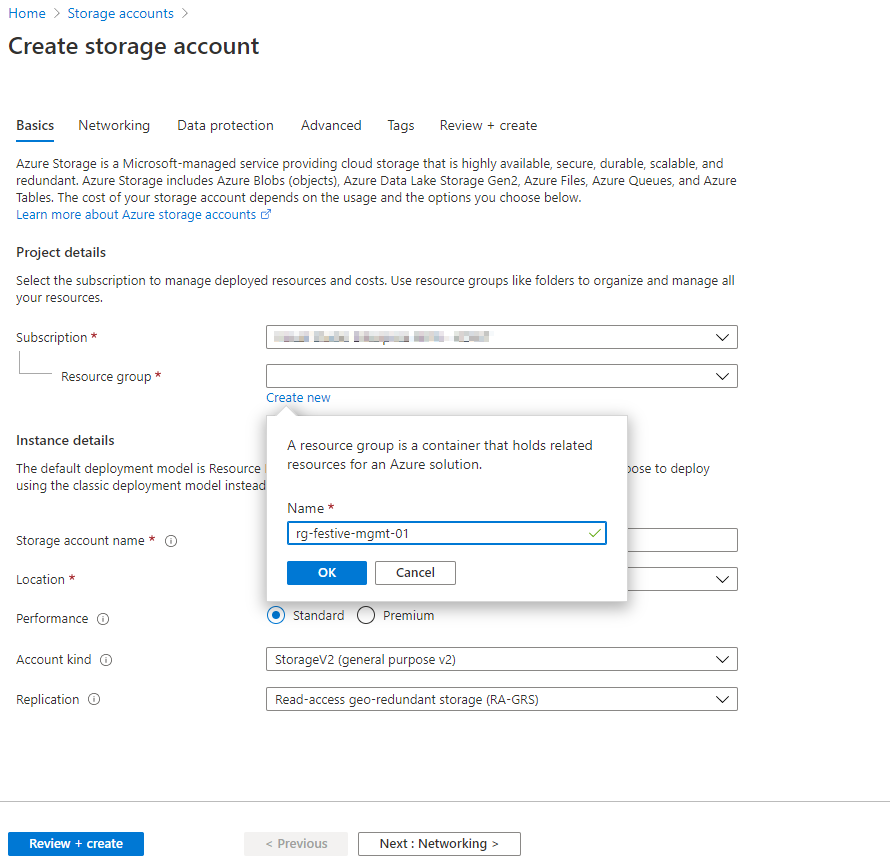
Remember the storageaccount name. Just copy and paste it in a notepad, because we will need it also later on..
Then we create the SAS key. Just copy and paste it in a notepad, because we will need it also later on.
Step 6: Create Build Pipelines
Azure Pipelines supports automatically build and test of code projects to make them available on platforms. Azure Pipelines combines continuous integration (CI) and continuous delivery (CD) to constantly and consistently test and build your code and ship it to any target.
Because I have predefined a YML file, you can just use that file to make the new pipelines. Yes, we will be having 3 pipelines.

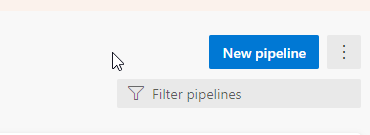
Create a new Pipeline:
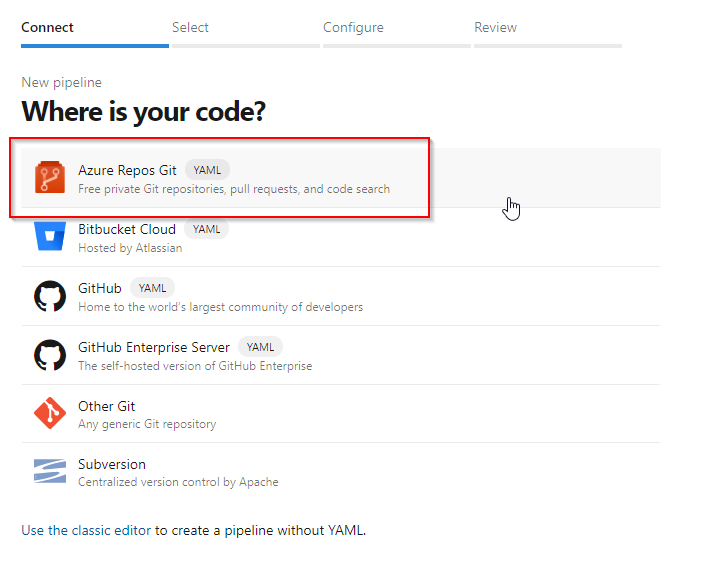
Where is the code? Select Azure DevOps Repo:
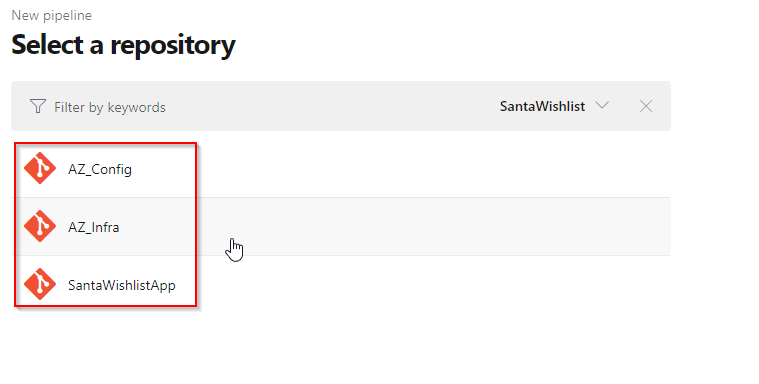
Select The repo where you are building the pipeline for:
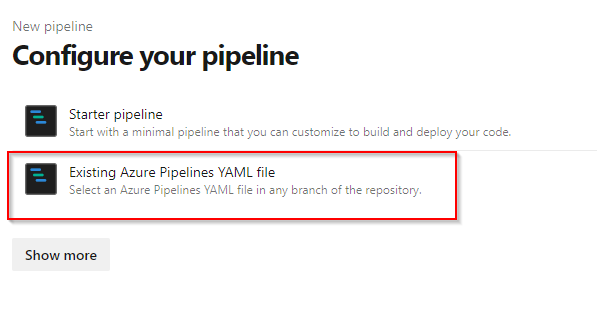
Select use existing YML file and select a path for the pipeline.
Now edit the pipeline to adjust settings:

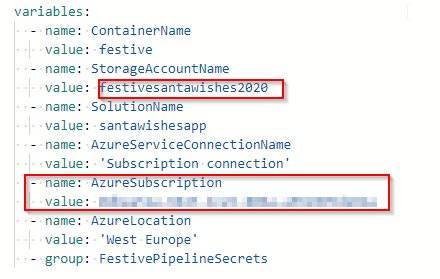
Change pipeline settings to your own parameters:
AZ_Infra
This pipeline will be used for building the Azure environment.
Follow the same
AZ_Config
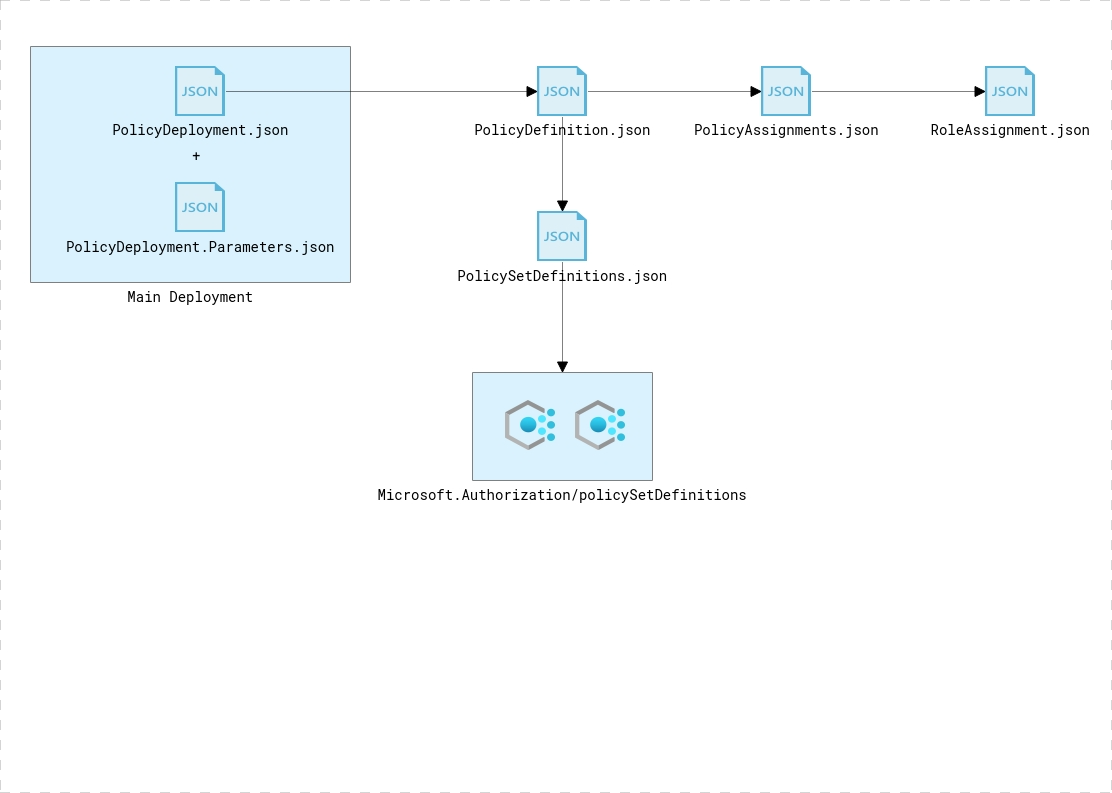
This pipeline will be used for building the Governance guidance.
To get the Governance into place, we are working with Azure Policy to apply a set of Policies with allowed and denied resources. We also apply RBAC roles where needed.
Azure Front Door
To make the Santa Wishes app globally available, we will implement Azure Front Door. As for now, and because I didn’t got enough time, You have to deploy Azure Front Door manually. This has not been made available into ARM Templates.
Azure KeyVault
Azure KeyVault will be used to store all the Santa Wishes secrets. We want to store the SAS token of the Storage Account in it.
As for now, and because I didn’t got enough time. But I have made a KeyVault template available and this will be an improvement for next version!
SantaWishesApp
This pipeline will be used for building the Blazor App and creating an Artifact that we can use to Release to an Azure WebApp.
Step 7: Create Secrets
To use to SAS key, we will use variable Groups in Azure DevOps. Variables give you a convenient way to get key bits of data into various parts of the pipeline. The most common use of variables is to define a value that you can then use in your pipeline. You can read all about it on the docs page.
Go to the library section in your pipelines:
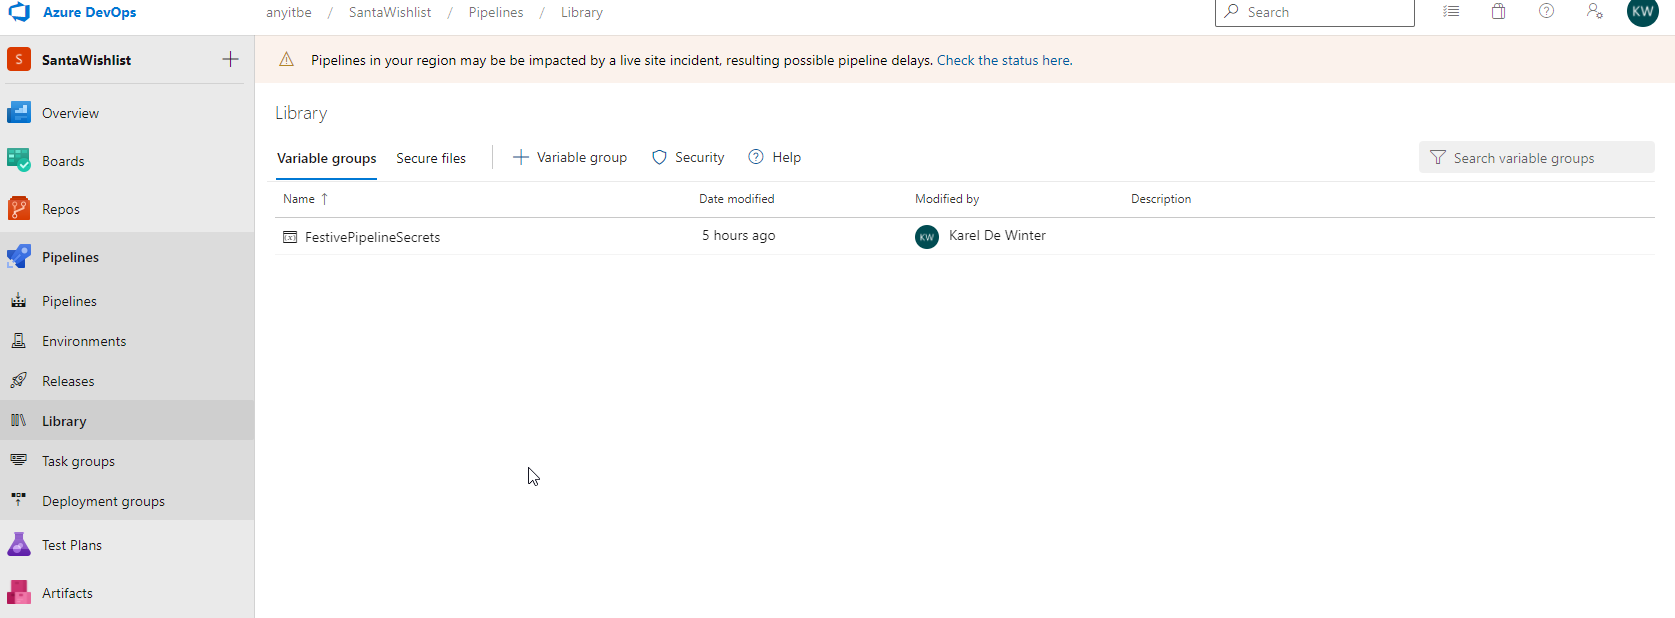
Create a new Variable Group and give it a name:

Next we need to create a variable in the variable group:
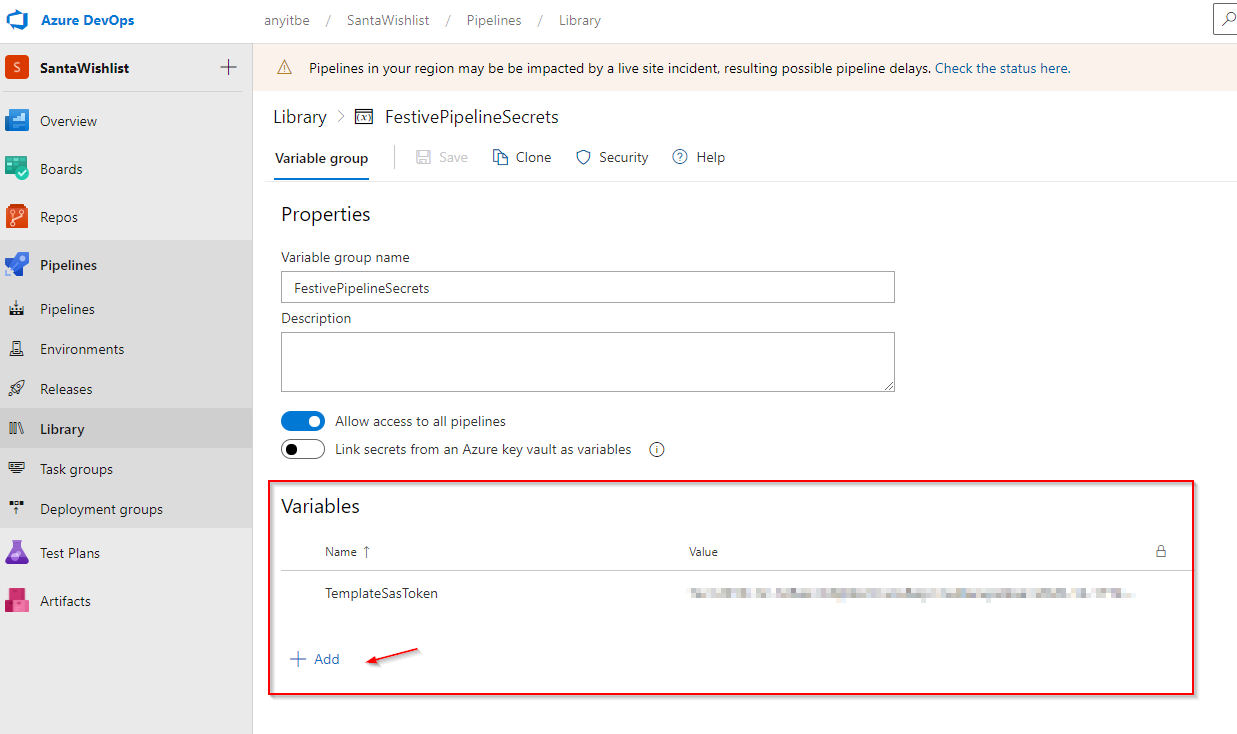
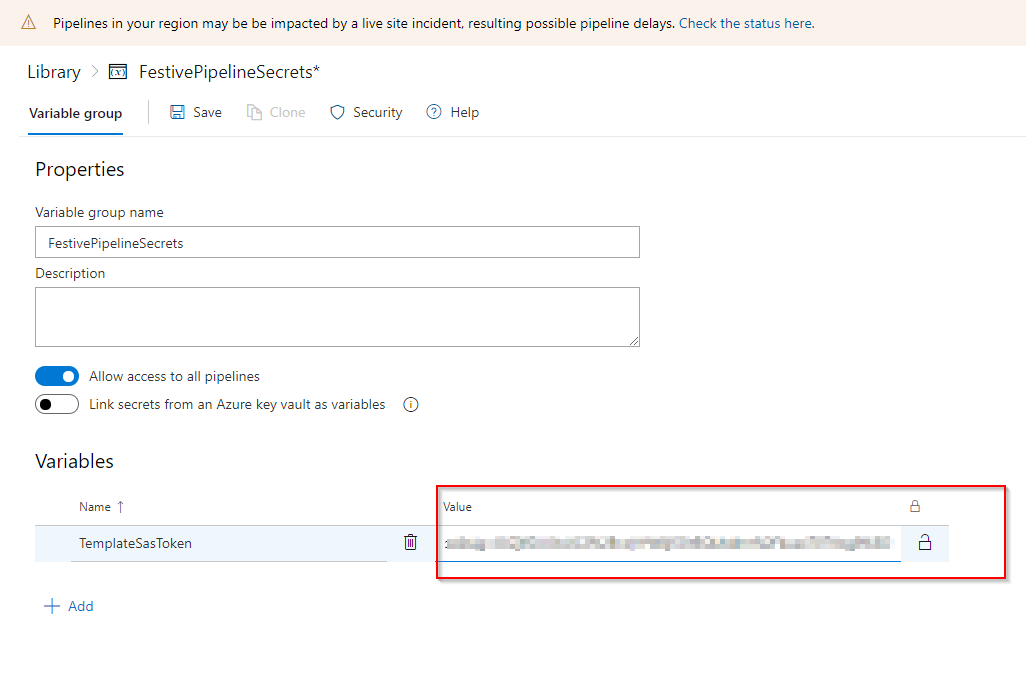
It is important that you use this name: TemplateSasToken and paste the SAS token from your notepad.
Step 8: Changing the parameters
Because my environment and yours are not the same, we have to adjust some parameters like subscription and storageaccount name.
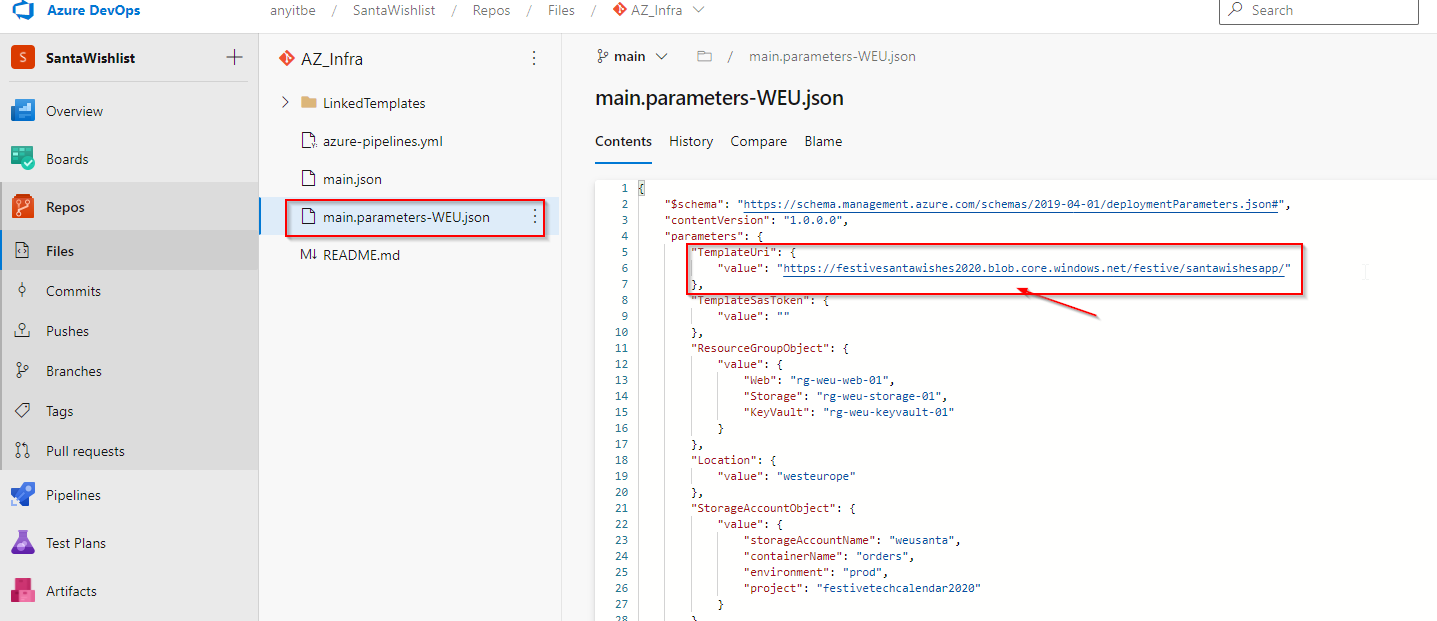
change for storage accounts
We need to create change the location of the storage account where we store the linked templates. For that, look up the storage account URI and paste it in the parameters file. Do this for both the AZ_Infra and AZ_Config repository:
Step 9: Creating a release for the app
We have now build the Blazor App via the Build Pipeline SantaWishesApp. The next step is to release the application to our WebApp.
For that, we have to make sure that our build of the application has succeeded.
Next up, we can create a new release, based and the application Artifact.
First of all, create a new Release Pipeline:
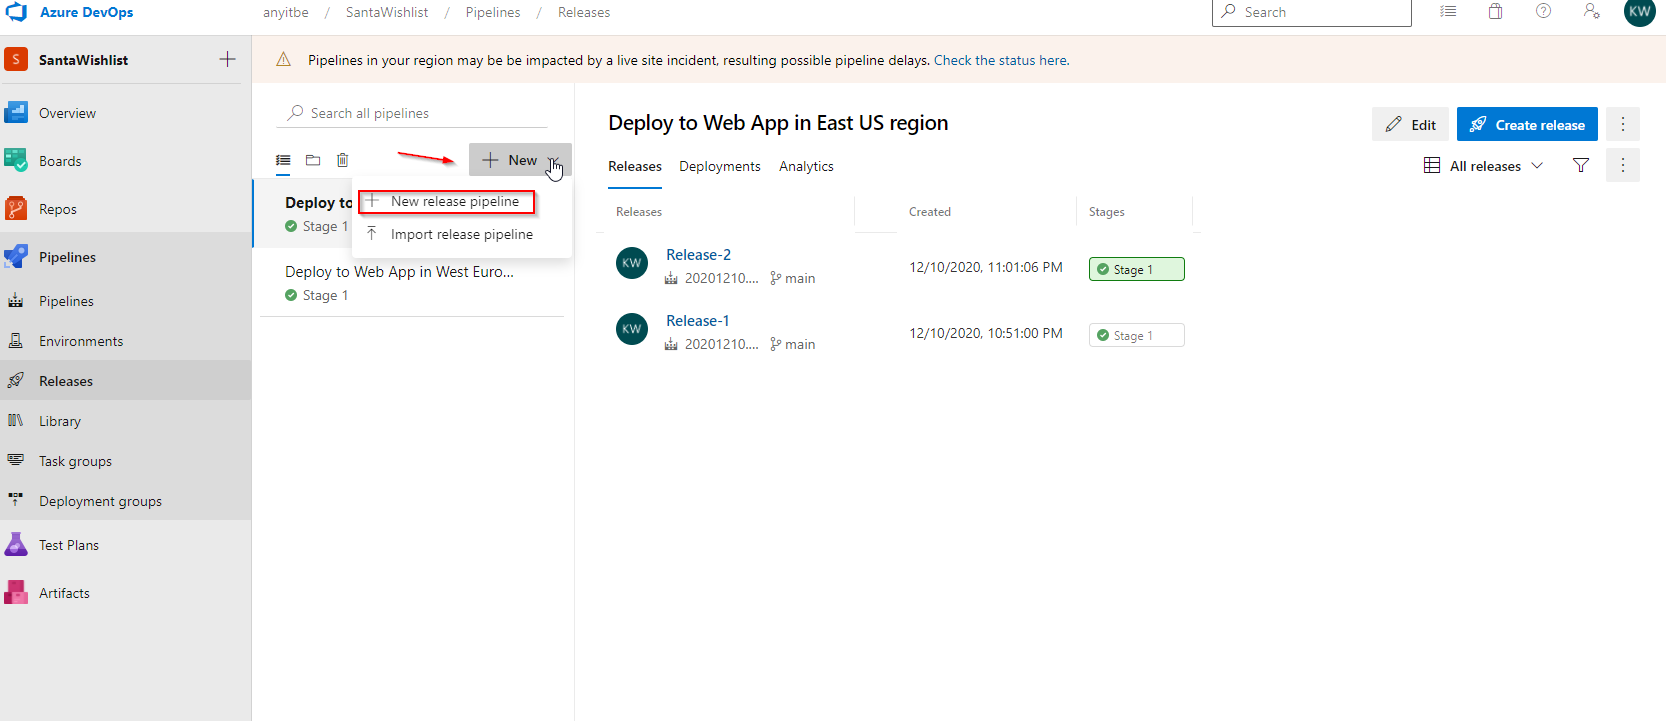
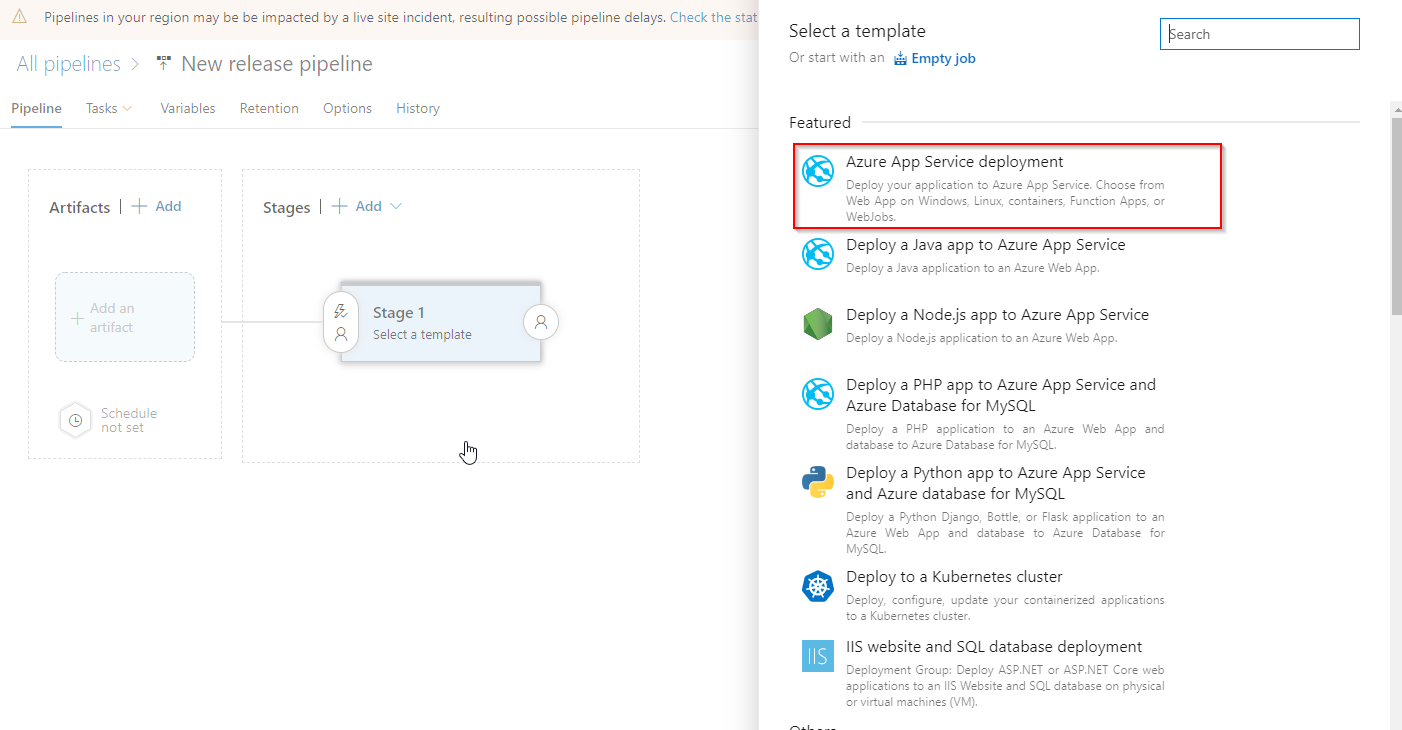
Choose to publish to a App Service:
Fill in a name:
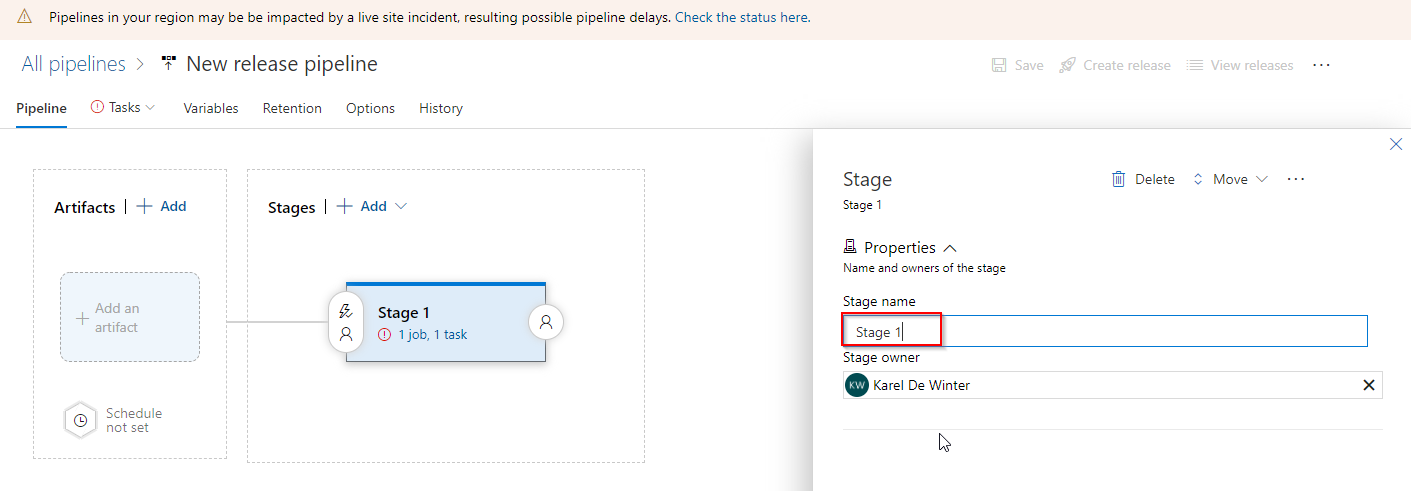
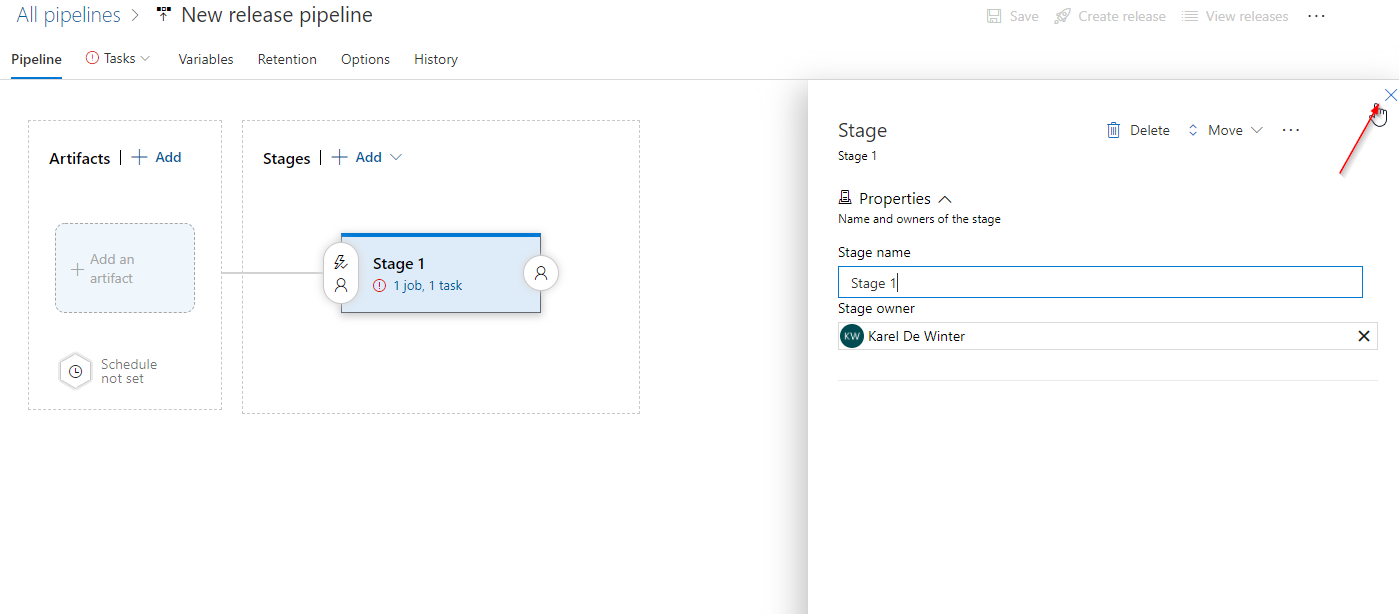
Just close the Stage Window, to go back to the New Release Pipeline.
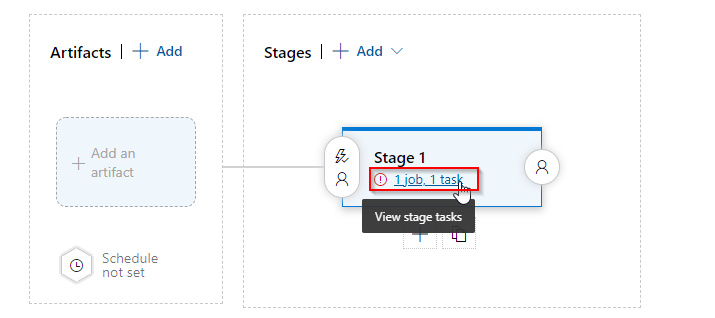
Click on the job and task link:
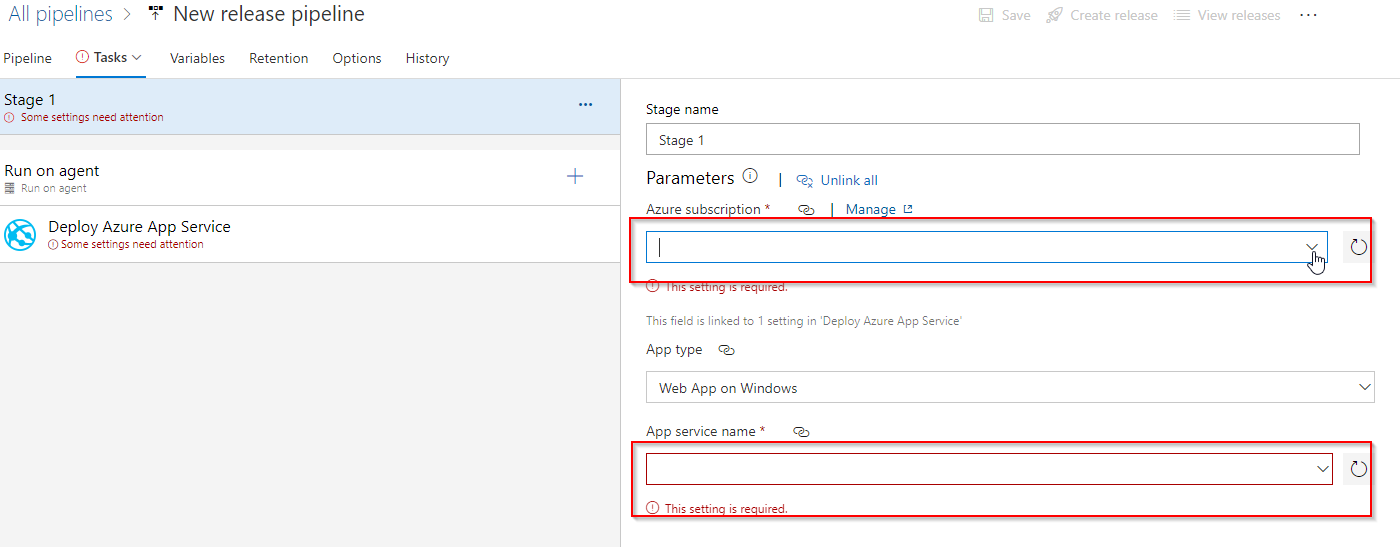
Choose a subscription, because we have made a Service Connection, only the subscription that Azure DevOps has access to, will be available to use:
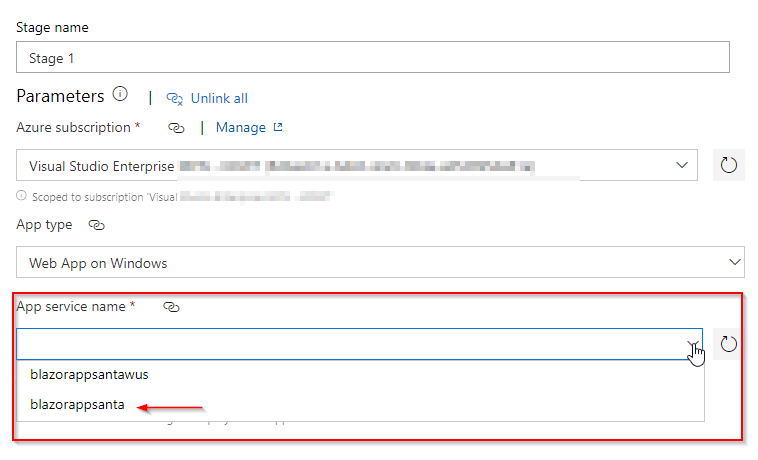
Now we can select the App Service where we want to deploy the code to:
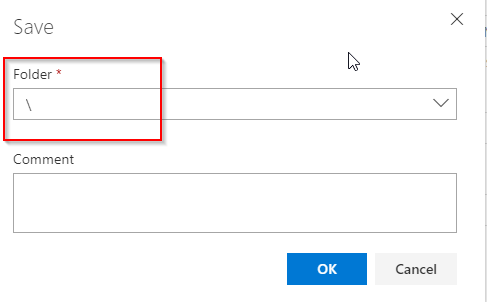
Click on Save and choose the root \ folder and click on OK.
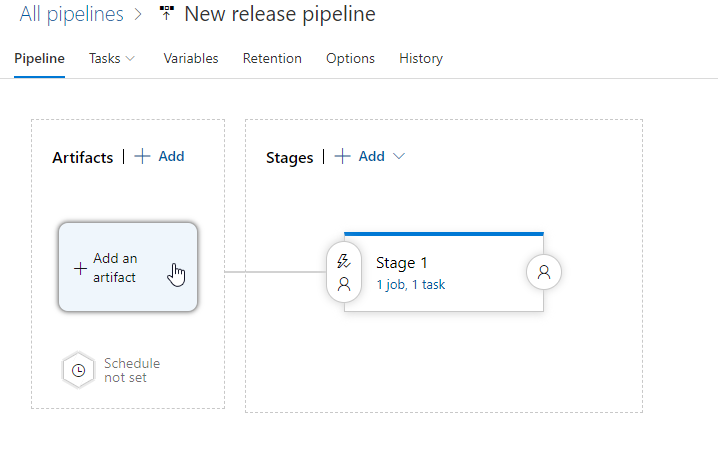
Now go back to the New Release Pipeline screen, so you can see the Release pipeline flow.
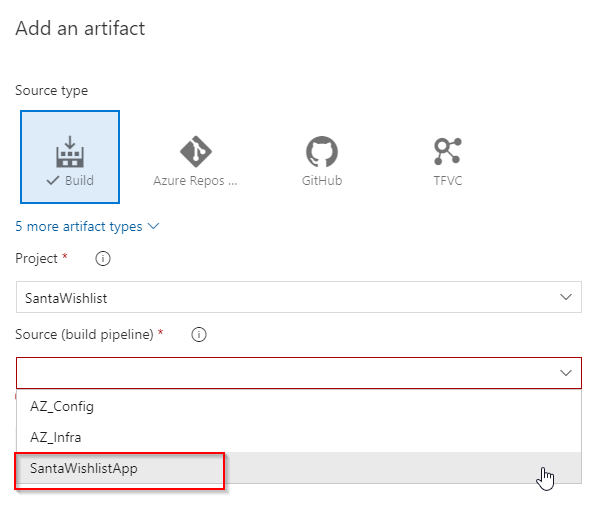
We have to select the Artifact, that will be our latest version of the application:
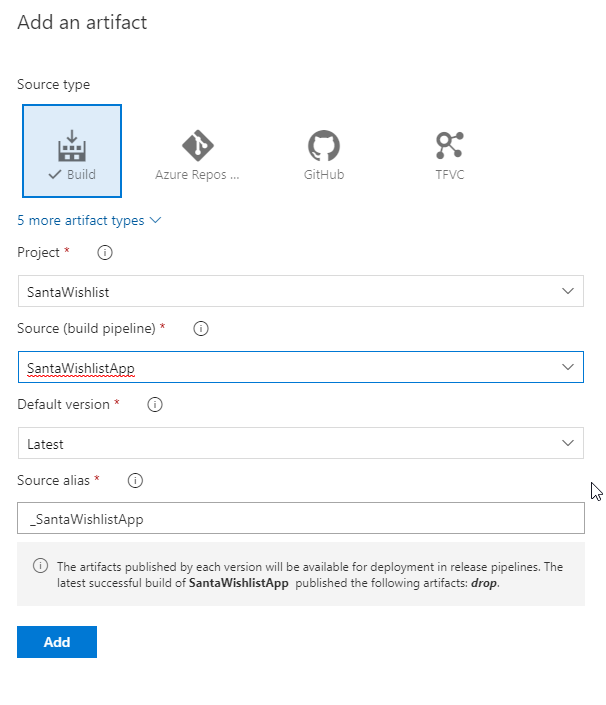
Now we can select our source, and that will be the artifact from our build pipeline. Just choose the Latest version as our Default Version and leave Source alias default. Final, click on Add:
Click on save, to save the release pipeline changes.

If you want, you can change the name of the release pipeline to something like: Deploy to Web App in West Europe region.
Don’t forget to enable to Continious deployment Trigger on our release, so we can make sure that after we change something in the sourcecode, it will be automatically deployed to the WebApp.
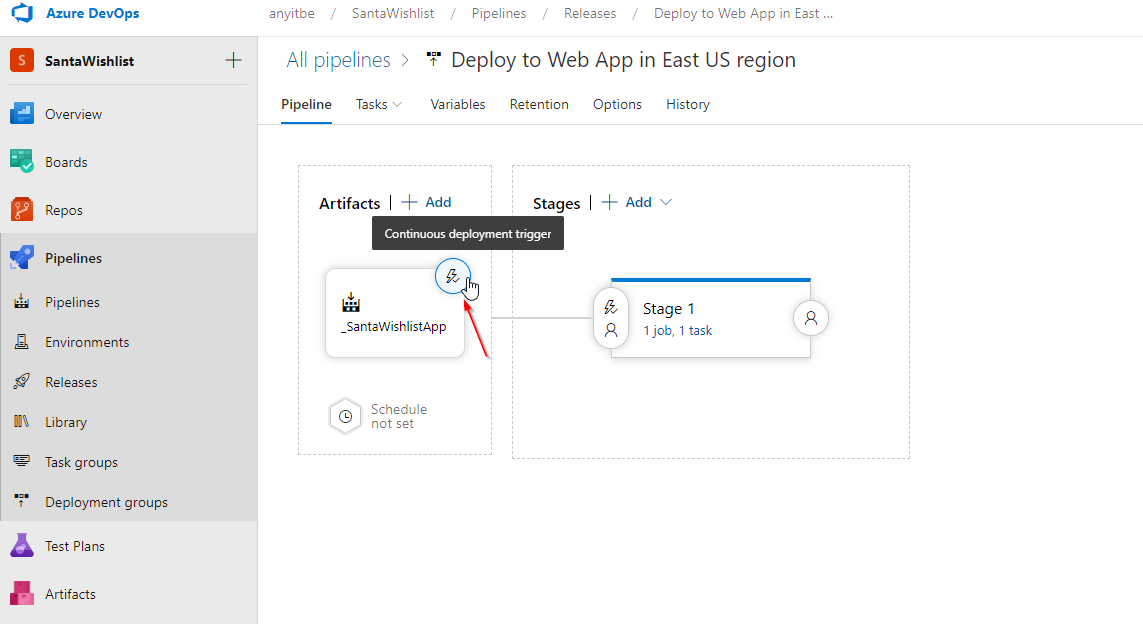
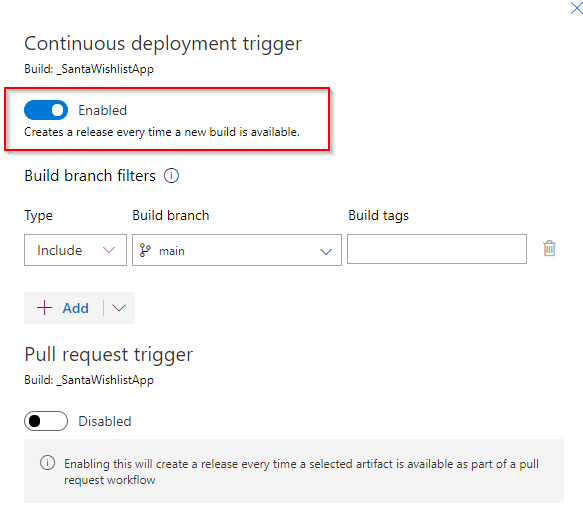
The last step is to simply create the release!

Deploying the solution
From now on, you can trigger the pipeline manually or just commit some code change in your repo and push it to Azure DevOps. The pipelines will be executed automatically and your code will be deployed!
What about a new region?
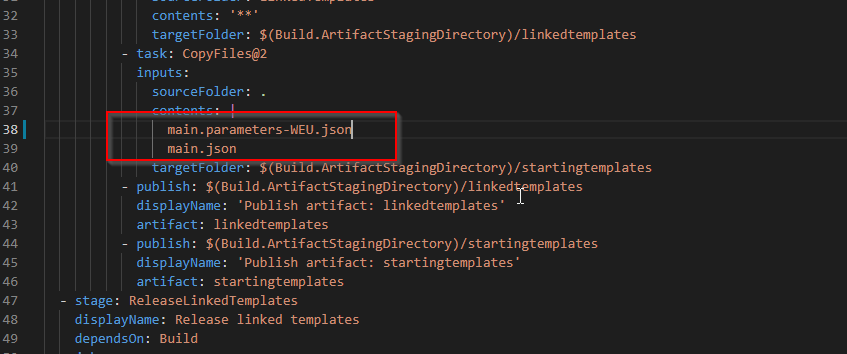
- Create a copy of the main.parameters-WEU.json file to main.parameters-??NEWREGION??.json and change the parameters. Change all the region parameter settings.
- Copy the AZ_Infra pipeline and change the parameters in the pipeline. Refer to the new parameter file in the different tasks:

What’s next?
This is it, Infra as code as easy as it is!
What is not included in my ARM Templates, is the creation of an Azure KeyVault and Azure Front Door. That’s for a next post.
Enjoy and have a happy new year!!


